SECTION SIX
REPAIRING LOOP 7, STEMS 8 & 10, AND LOOP 2
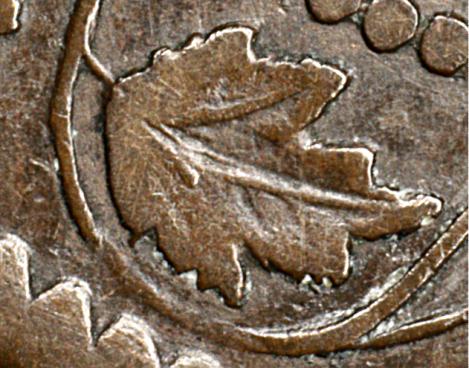
The Repair of Loop 7 and Stem 8
Loop 7 and Stem 8 were already broken when the first 1859 N9 dies were sunk, so the situation for them is very straightforward: if either is fully intact on an 1859 N9, then it must be a replacement. So far, only one die with a repaired Loop 7 and fewer than 10 dies with a repaired Stem 8 have been traced. It is typical to have “slips” onto the leaf for a repaired Stem 8 similar to those seen with Stem 9.
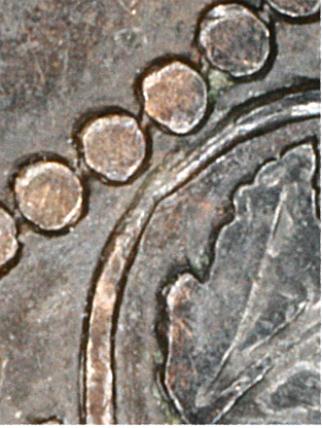
Repaired Loop 7
|
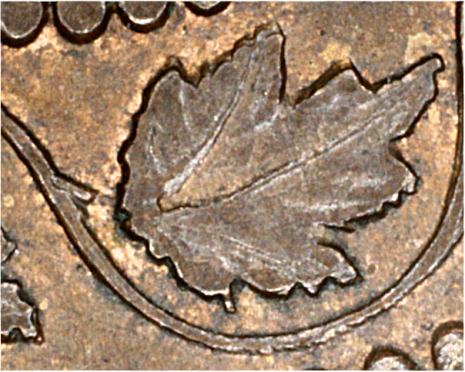
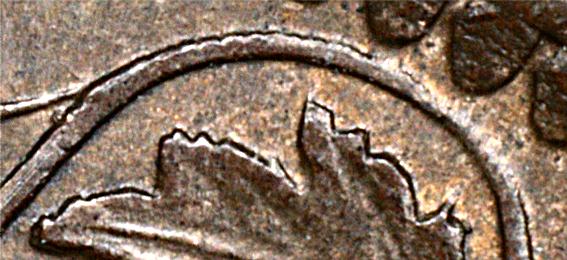
Repaired Stem 8
|
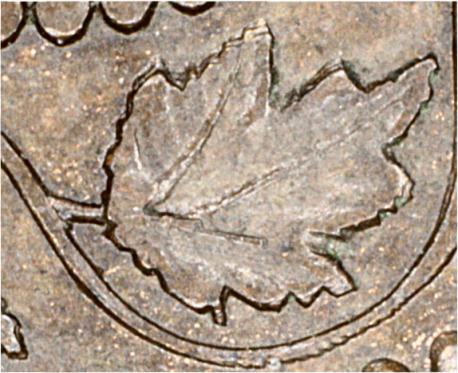
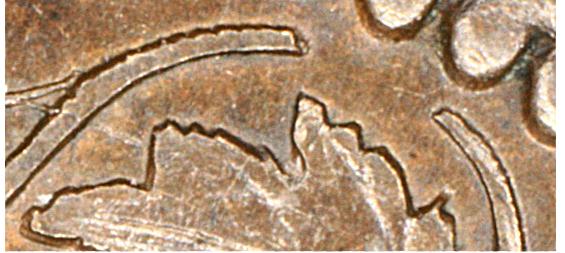
Repaired Stem 8
(2nd die) |
The Repair of Stem 10
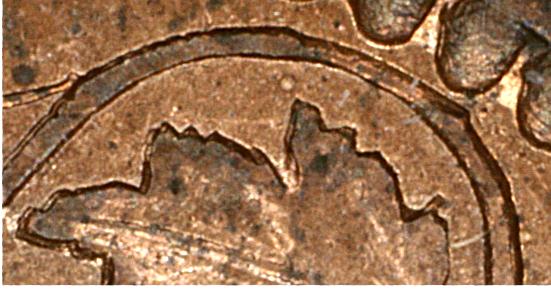
Stem 10 is another matter. It broke off when the sinking of the 1859 Narrow 9 dies was well along, so a complete Stem 10 on an 1859 can be either original or repaired. There are two things that help in differentiating between an original and a repaired Stem 10. The first is the shape of the stem. The original stem is triangular, broadening as it approaches the base of the leaf. Based on the repair patterns for Stems 8 & 9, any re-engraving after the Stem 10 broke off would be expected to produce a stem of more or less constant width. Second, the presence of any engraving slips on the leaf itself would be a clear confirmation that the stem had been repaired (There were no slips when the stem was originally incorporated into the wreath). To date we have recorded with certainty only a single die on which Stem 10 is repaired (confirmed by re-engraving “slips” up onto the leaf).
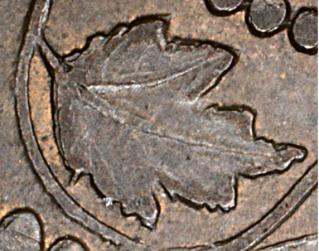
Original Stem 10
|
Repaired Stem 10
|
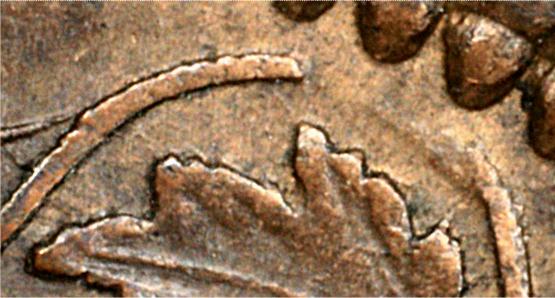
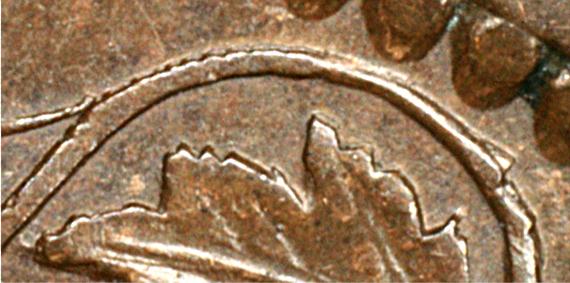
The Repair of Loop 2
There are two things about the gap that formed in Loop 2 that differentiate it from the gaps in Loops 7 & 13. The first is that the Loop 2 gap had no residual material at its bottom. The field in the gap is completely smooth, as though nothing had ever been there. It is probably for that reason, plus its more prominent location at the top of the wreath, that the engraver repaired this gap most of the time it appeared. The second difference is that Loop 2 comes both original and repaired on the 1859 N9s, so one must be able to tell the difference.
Original Vine Loop 2
|
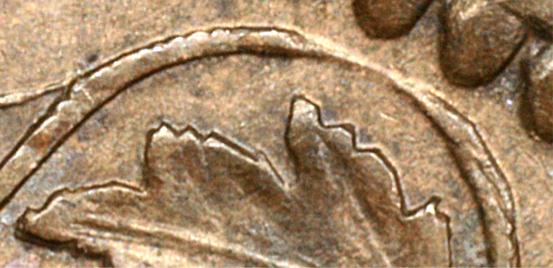
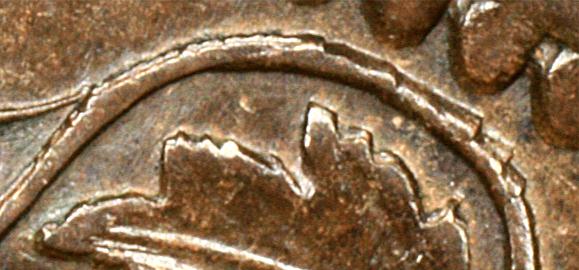
Vine Loop 2 Gap
|
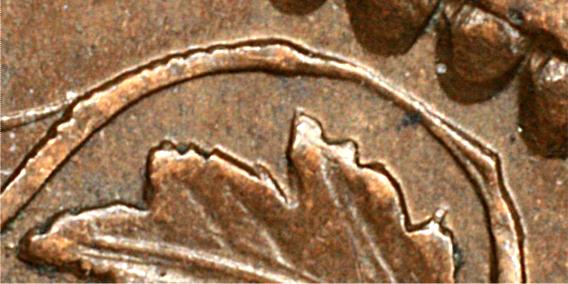
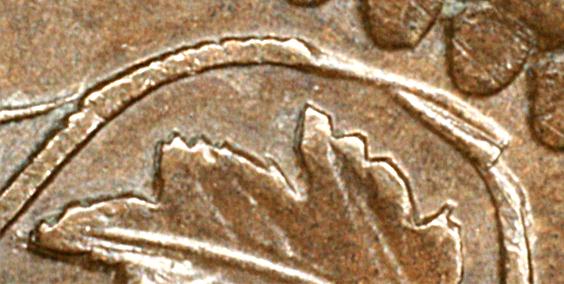
Well-Repaired Vine Loop 2 Gap
|
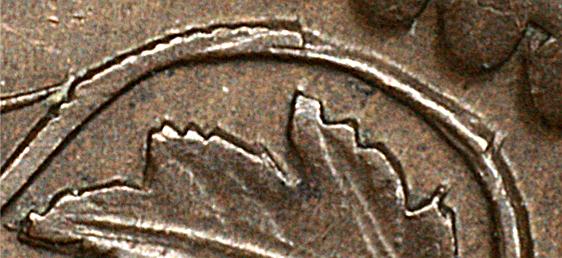
The Loop 2 gap was closed by cutting from right to left in the die (left to right on the finished coins). A variety of burin shapes were used, so the loop closure varies from very thin to very thick. Multiple cuts were typically used and one can often see the end of the cuts extending beyond the curved upper edge of the vine loop (see below). Sometimes the repair didn’t quite close the gap. Nevertheless, for the purposes of our work all attempts to close the gap, no matter how successful, are considered to be repairs.

Repaired with slight gap to the left
|
Crudely repaired with large gap to the left
|
Thinly repaired (completely closed)
|
Thinly repaired with doubled right end
|
Thin left end, thicker right end
|
Thicker repair with squared ends at right
|
Thick repair with squared ends all along
|
Spectacular doubling at right
|


