SECTION SEVEN
SURFACE MARKS MADE DURING DIE DRESSING
Following the repair of defective characters and device flaws, the die table (the flat upper surface that would become the field on the coins) was cleared of any burrs by filing and was polished in a general process that can be called dressing. Unintended surface marks were sometimes introduced, including file marks and gouges in the table and scratches on the devices. Also, some reverse dies received excessive polishing, causing leaves to “bottom out” and outer vine loops to “disappear” below the plane of the field.
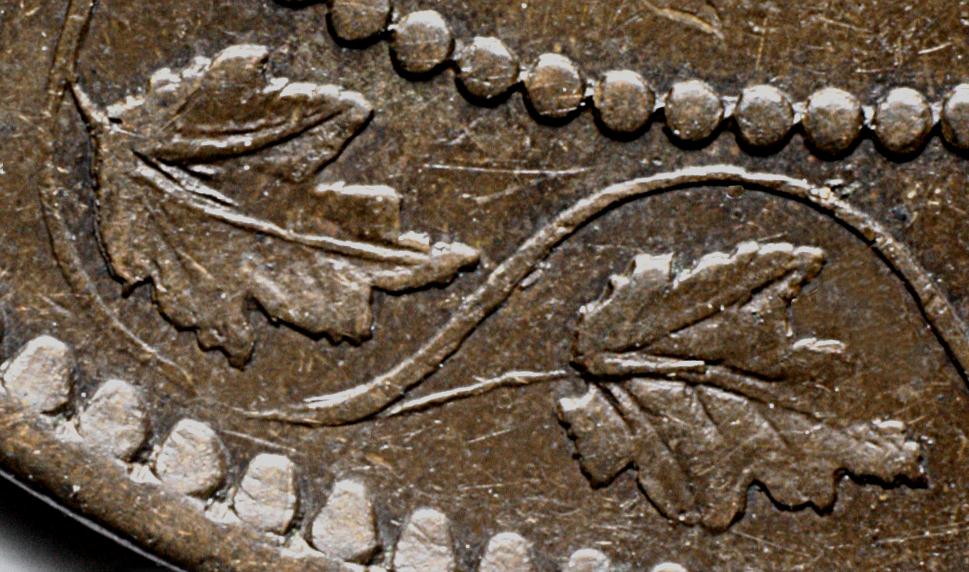
File Marks
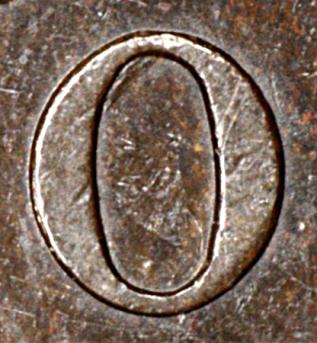
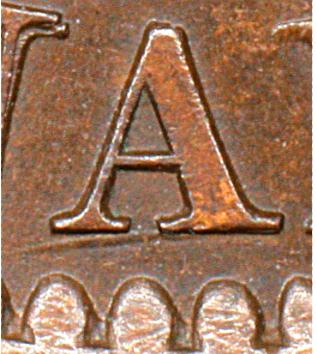
File Marks in Left
Top of ONE |
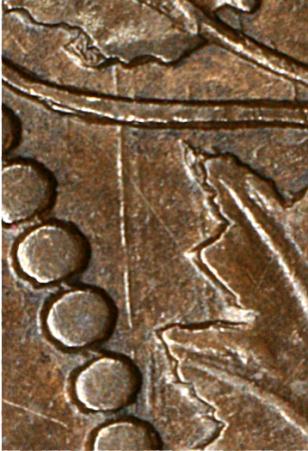
File Marks Near
Leaves 3 and 4 |
File marks near denticles next to Leaf 3
|
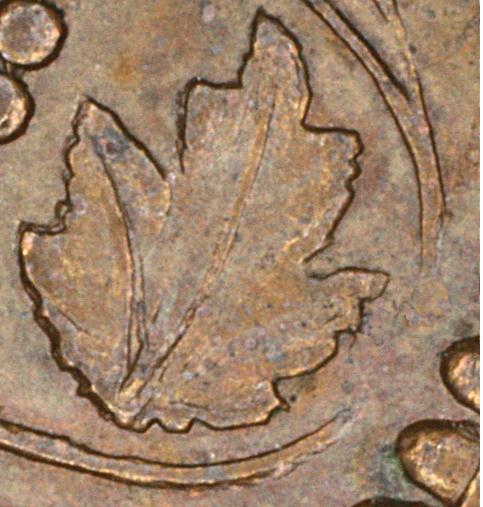
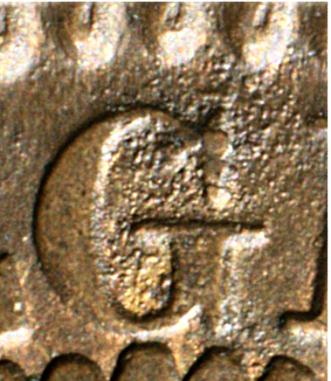
Gouges and Scratches
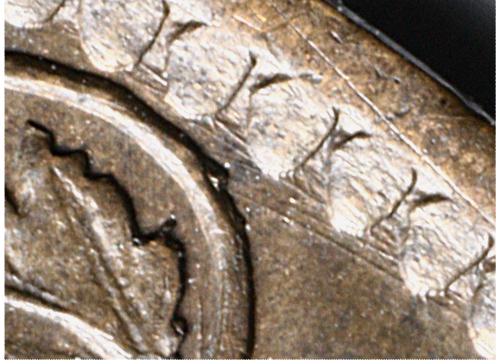
Gouge Below
Leaf 2 |
Gouge Below
CANADA |
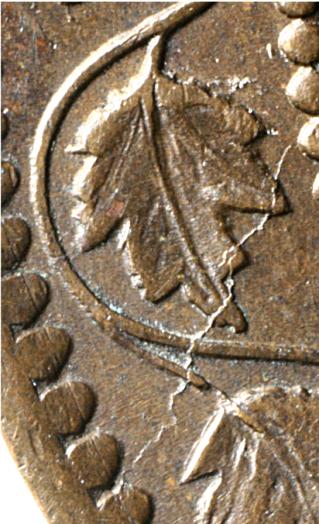
Scratches on
Leaf 2 |
Overpolishing
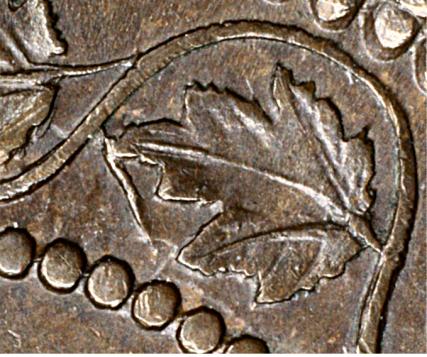
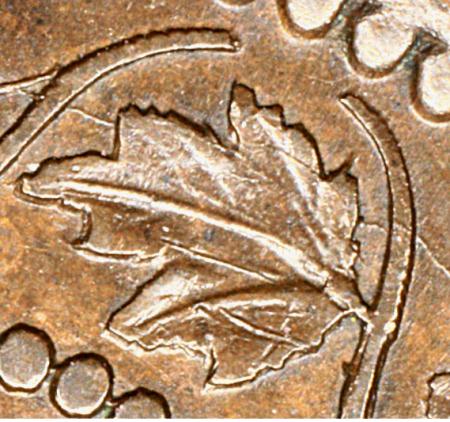
Normal Leaf 2
(Strong Midvein) |
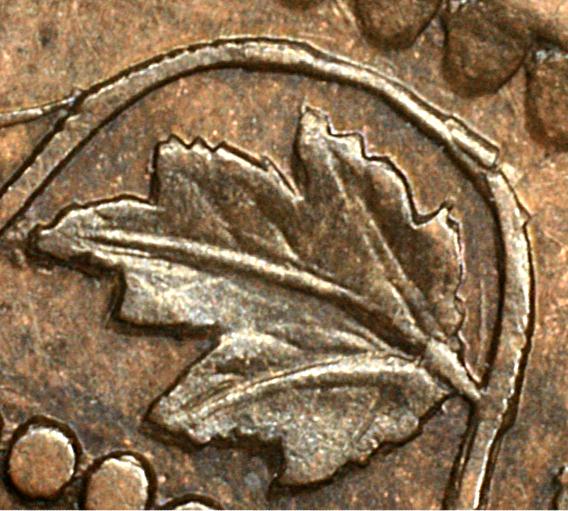
Leaf 2 Slightly Over polished
(flat center, thinned midvein) |
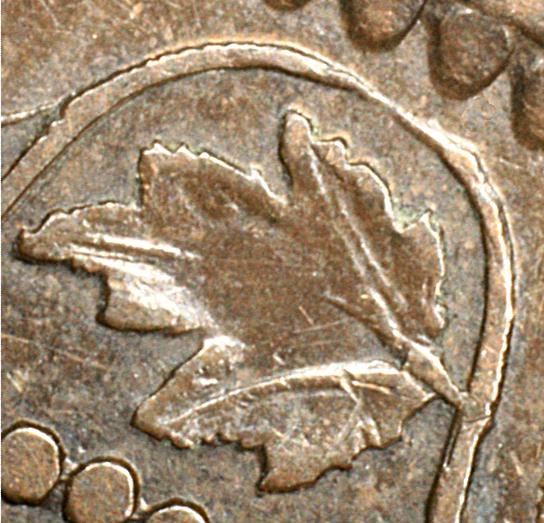
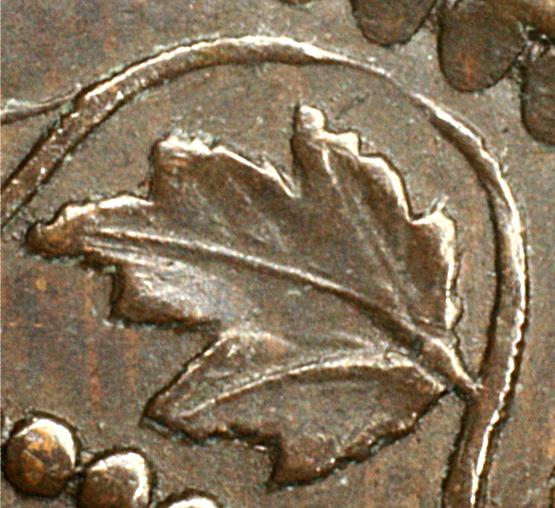
Leaf 2 Strongly Over polished
(missing detail includes part of the midvein) |
Leaf 6 Over polished
vine loop |
Heavily over polished L9-10 area
|
Die Features That Appeared During Storage or Use
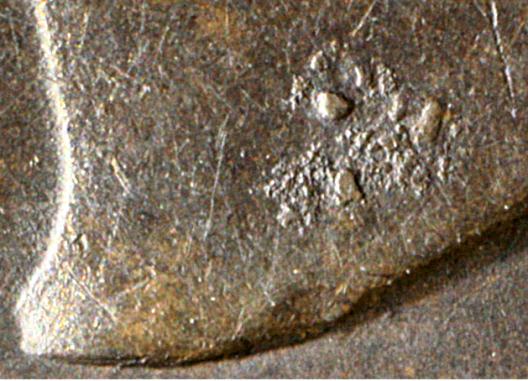
Rust Marks
Several dies have been observed to have what are most likely rust marks. The three most pronounced cases are illustrated below. During prolonged storage, unprotected dies exposed to water could develop dramatic pockets of rust, causing roundish bumps of various sizes to appear on the coins struck from them.
Rust Marks near
Center of Neck |
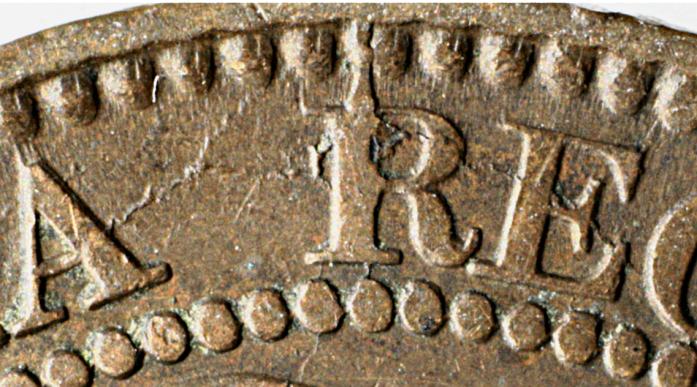
Rust Marks
at REGINA |
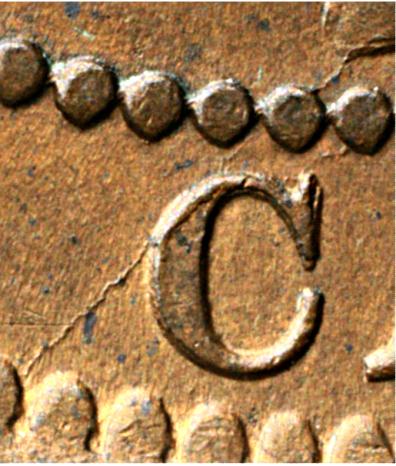
Small rust marks on CENT
|
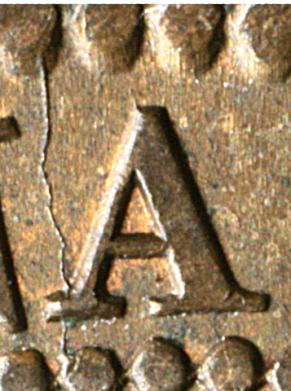
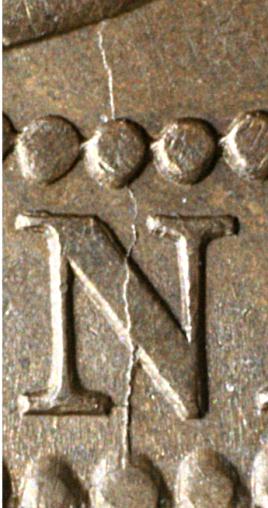
Die Cracks
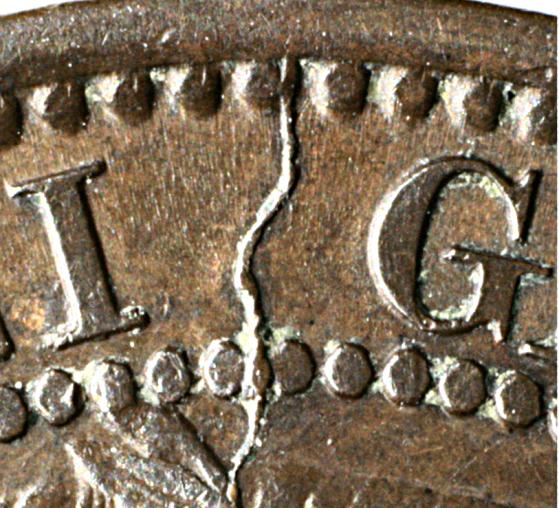
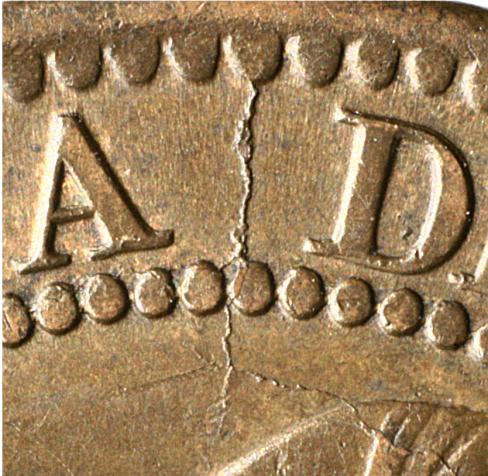
Die cracks appear as tiny rivers of raised metal wandering across the field and up onto letters, numerals, the maple wreath and sometimes the Queen’s portrait. Although there are many outwardly similar crack patterns in this series, close inspection reveals that every die crack is slightly different from the others. Thus, die cracks are an extremely useful tool for quickly zeroing in on the attribution of many 1859 N9 dies, both obverse and reverse.
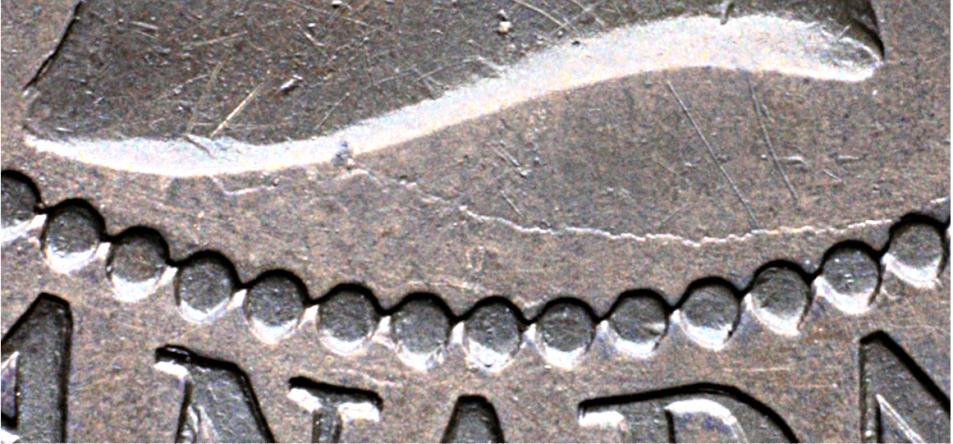
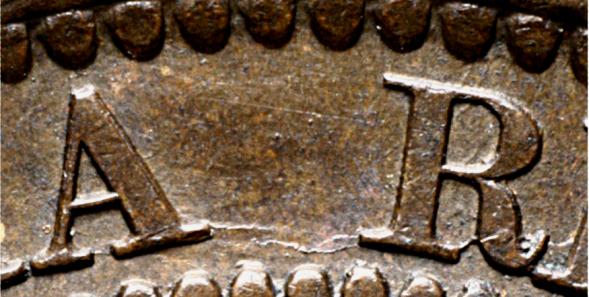
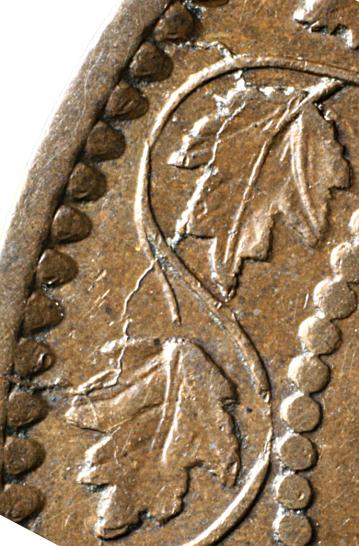
Most die cracks are radial cracks; that is, they tend to approximately move along imaginary radii from the center to the edge of the circular coin. The exact opposite of radial cracks are circular cracks, jumping for example from letter to letter on the obverse or from leaf to leaf on the reverse. Finally, there are diagonal cracks that cut across the radii but are not parallel to the edge of the coin.
Most die cracks are radial cracks; that is, they tend to approximately move along imaginary radii from the center to the edge of the circular coin. The exact opposite of radial cracks are circular cracks, jumping for example from letter to letter on the obverse or from leaf to leaf on the reverse. Finally, there are diagonal cracks that cut across the radii but are not parallel to the edge of the coin.
|
|
|
Examples of radial cracks
|
|
Examples of circular (or primarily circular) cracks
|
|
Examples of radial cracks that have circular branches
|
|
Examples of diagonal cracks
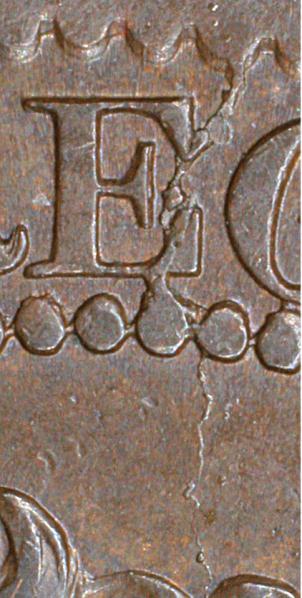
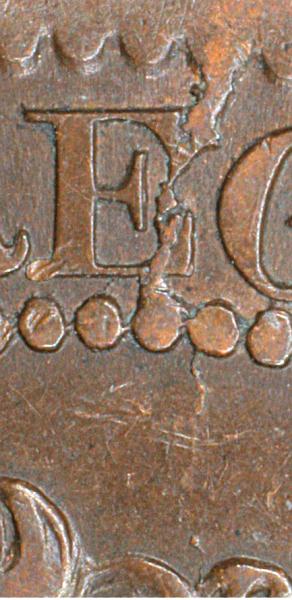
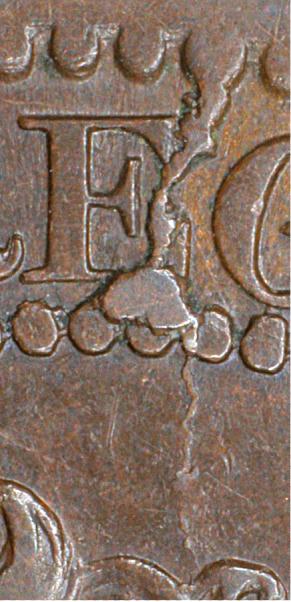
Some dies seem to have been cracked the moment the first coin was struck. More often, cracks develop during use. In any case, once present, cracks tended to continue to enlarge. A nice example of crack enlargement can be seen in the photo series below, showing a crack through REGINA. In the left-hand panel the crack is already well developed. However, in the center panel it has enlarged, particularly between the rim denticle and the upper front of the E. In the right-hand panel the crack has reached spectacular proportions. The upper portion is much larger and a giant raised blob covers part of the bottom of the E.
|
|
|
Crack progression


